I am always without ideas when it comes to hostess gifts or house warming gifts. If invited for dinner, I tend to bring a generic bottle of wine and make a wine bag. But the wine does not have longevity and I am not sure every hostess wants to store (or reuse) a cloth wine bag.
Then it finally came to me :: cloth napkins! People like them, but do not always want to spend their own money on them. They are a great way to add a pop of color to a kitchen without over committing. They are green (ecologically, not always fabric-wise), unisex and have staying power. Perfect! Want to make a set with me?
Let's start with your fabric choices. I used a continuous cut of one print (35 inches x WOF quilting cotton) to make a set of 4 napkins, but you could also use four complimenting fat quarters. I pre-washed and ironed before making the napkins as I didn't want weird shrinkage after they were finished.
 |
| Note: I use three different fabrics in this tutorial. It means nothing other than the sun was setting and you could no longer see the light blue fabric as it got darker. |
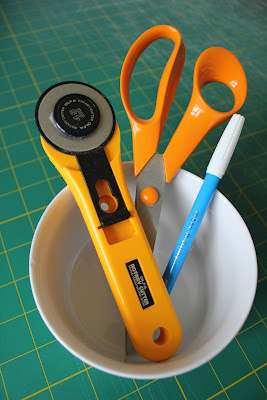
In terms of notions, you will need scissors, a marking pen, a rotary cutter, your rulers and a bowl. This bowl is 5 inches in diameter. You will not need a sewing machine, but will need an over locker. That's right - pull that over locker out of the closet and dust it off.
Fold your fabric in half so the selvages are matching. Fold it in half again the other way so the two raw edges are matching. You should now have four overlapping layers. Trim a sliver off the raw edges so they are not so scraggly.
Without opening your folded fabric, rotate it and cut your selvages from the main body of the fabric.
Rotate the fabric again (without unfolding it) so that the folded edge is on the right and the raw edges are on the left. We are making napkins that are 16 inches square. Now, I do not have a ruler that is 16 inches wide to measure that, so I have to get a little innovative. I used a 14 inch square ruler (green, left) and a 6.5 inch wide ruler (black, right). I combined a width of 9.5 inches from the green ruler and the full 6.5 inches of the black ruler to get a cut of 16 inches wide. Cut off the folded edge.
Again, rotate your fabric and repeat the same ruler regime to cut off the other folded edge. You should have a set of four pieces that are 16 inches square.
Again, rotate your fabric and repeat the same ruler regime to cut off the other folded edge. You should have a set of four pieces that are 16 inches square.
Flip the bowl upside down and align it with the two edges. Trace around the lip of the bowl with a marking pen. Do the same for the other three corners.
Trim along the line with your fabric scissors. I cut all four layers at once as my scissors are very sharp. If you do that, make sure to keep the fabric and scissors flat on the cutting mat so the layers do not shift too much.
You should now have four pieces of fabric that are 16x16 with rounded corners.
With Brian's help, we made a movie to show you how to finish the raw edges of the napkins using an overlocker. A few things to note:
1) Always start with a tail of thread on your over locker.
2) Slow down at the corners, lifting the presser foot as needed to adjust your fabric and avoid wrinkles.
3) As you approach the end, trim off the original tail.
4) To finish off the edge, sew over your starting point, turn the fabric about 90 degrees and continue off the fabric to make a finishing tail.
5) Create a tail of about 3 inches so you can securely finish the napkin.
Here we go!
Using a blunt needle with a large eye....
....thread the tail through the eye...
... and trim off what's left of the tail.
Ta da! A finished napkin. Repeat for the other four to finish off your set.
I tend to fold them into rectangles so that the curved edge is a corner "accent", then place my flatware on top.
I hope that was clear - email me (fluffysheepquilting at gmail dot com) if you have questions and I will try my best to help you along. A few alternative options that you might like: 1) you can shorten your stitch length to have less of the fabric showing through the edge and instead have more of a satin finish or 2) use a wooly nylon thread that poofs up as you sew to hide the fabric. Thank you!


ReplyDeleteThank you for the lovely video and tutorial!
Sadly I need you to put the overlocker into my closet first! But lovely quick gift - you are a bit speedy down the straight! Best bit is at the end - I love Brian!
ReplyDeleteWe love cloth napkins at our house! Thanks for the tutorial.
ReplyDeleteI love the end of the video! I was also always told to leave 3" between the needle and the end of the tail when using the overlocker as it helps prevent the overlocker from becoming unthreaded. I love the way you darned in the tail; it gives a really neat finish!
ReplyDeleteThanks for the tutorial Cindy!
ReplyDeleteGreat idea for hostess gifts! Thanks for a very clear tutorial!!!!
ReplyDeleteGreat tute. Love the end
ReplyDeleteAutomatic Napkin Vending Machine
ReplyDelete