
Have you signed up for the Fluffy Sheep Quilting charm Pick-A-Pack Crew?
It's easy peasy - just hop over here and leave a photo of your favorite fabric in the linky party!
It is with great happiness that I show you the finished center block for my medallion quilt! I did struggle a bit putting together the eight slices of the block, but in the end I'm reasonably pleased with how those seams came together. With 88 pieces in the one 12.5 inch block, I can not expect every seam to be nice and crisp.

As you may remember, I'm following the Medallion Sew Along instructions to create this quilt. My first center block should be 15 inches (finished), so I added in an orange Half Mood Modern scissor print to bring it up to size. I then decided to set it on point with a texty print background fabric. So far so good!
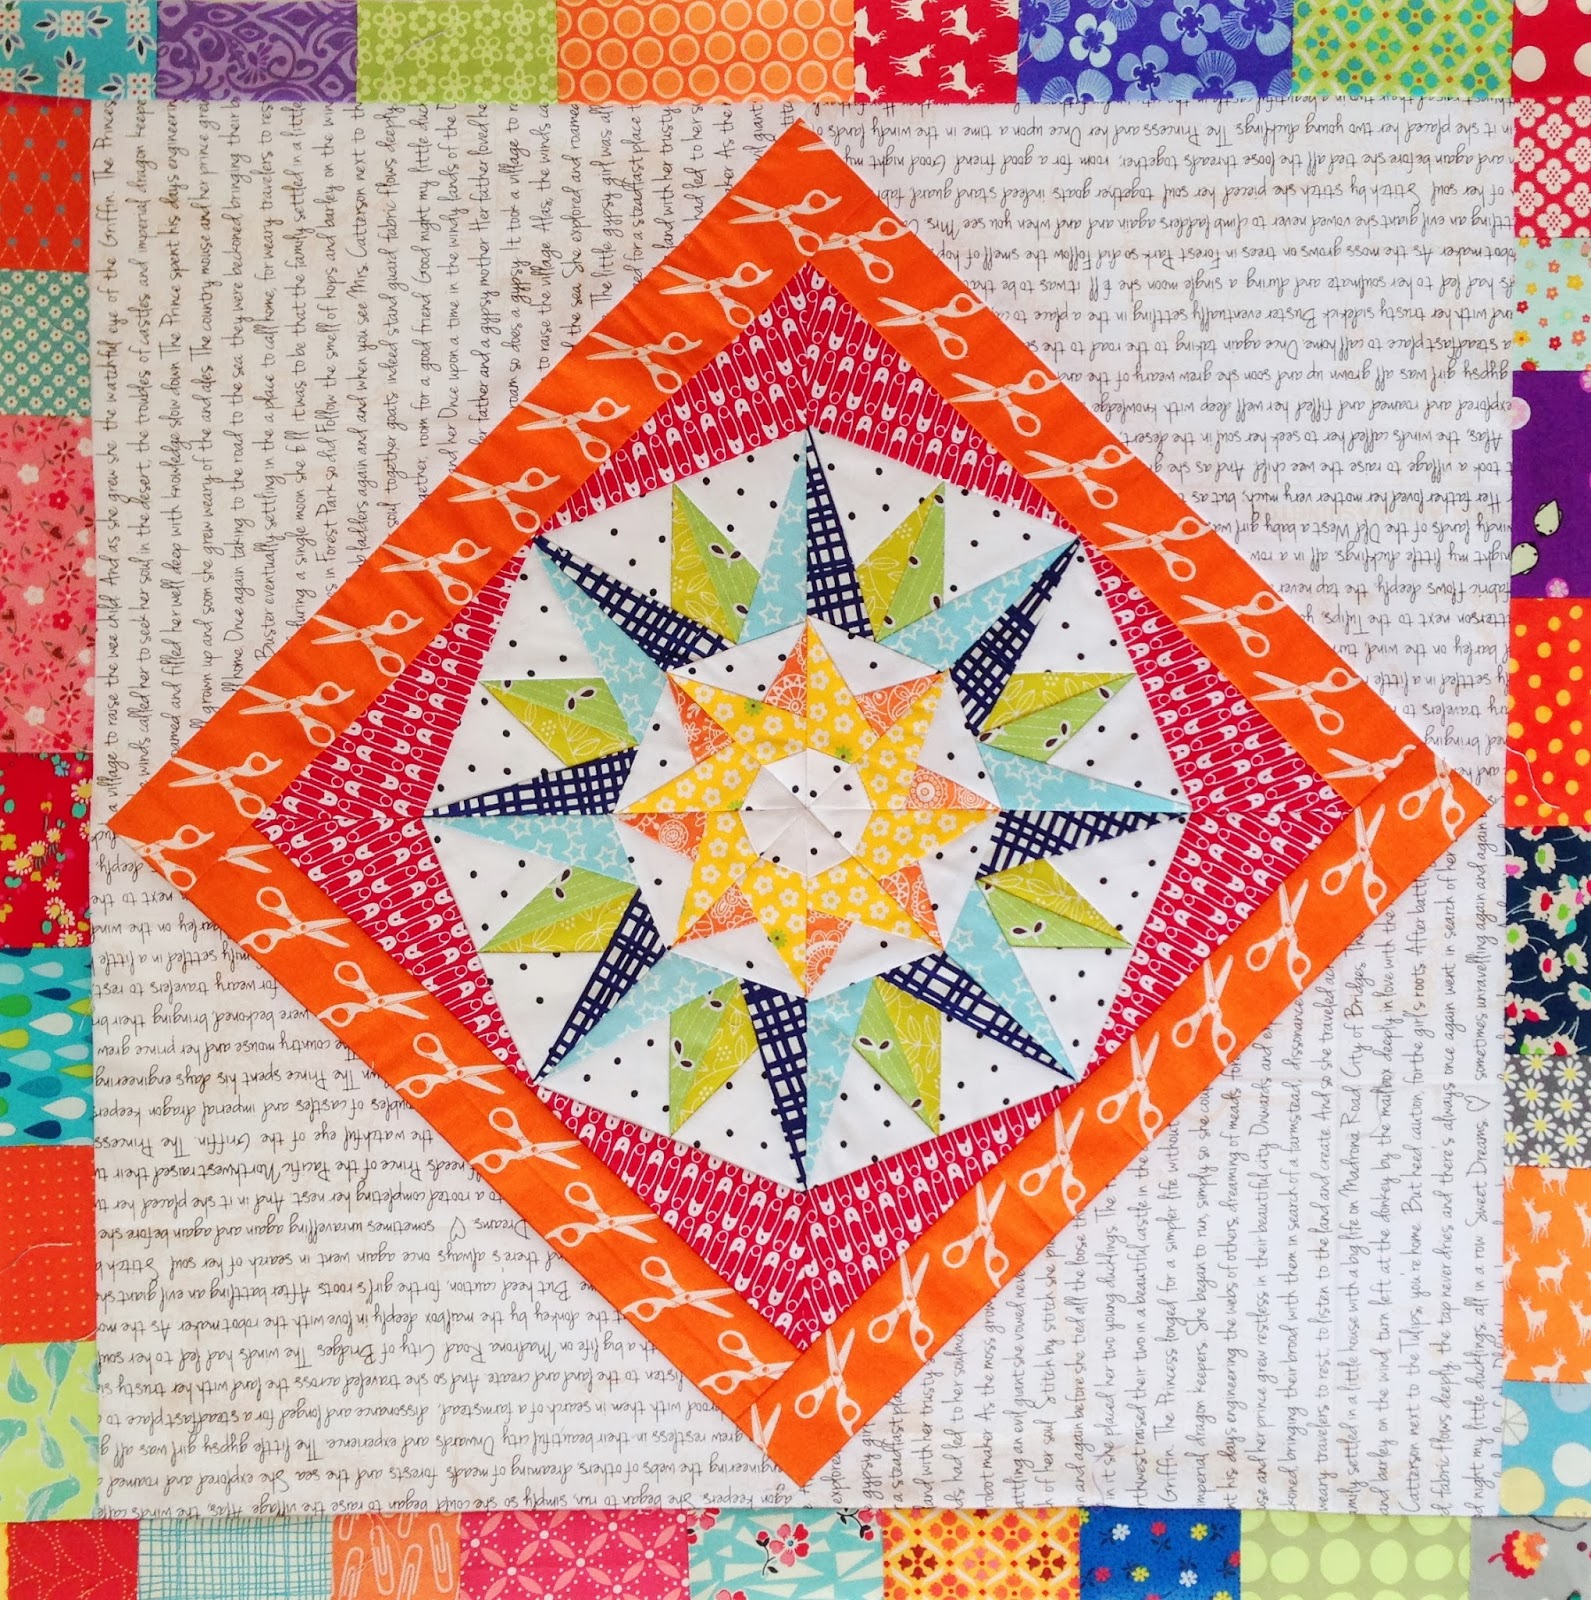
This week our challenge was to add our first border to our (rather large) center block. My border needed to bring the final top size to 24 inches. I want this to be a scrappy quilt, so I brought in several all new fabrics, but tried to keep with saturated, somewhat monochormatic fabrics that "read" as a solid color.

Now here's the rub. I made the border 2 inches wide, thinking I'd just trim it down to the 24 inch center block that I need for this step in the QAL. Otherwise, because I set my 15 inch block on point I had to add a weirdo border of 1.3 inches to all sides. Yes, trimming would be easier. The only problem is that I misinterpreted the (very clear) instructions....it's not 24 inches UNFINISHED (what I now have) but 24 inches FINISHED. Stinker. I will have to unpick my border, add on another two inch border and instead trim to 24.5 inches. I'm a bit mad at myself, but it is easy enough to fix...unless one of you has a great idea that doesn't involve a seam ripper? I'm open to suggestions!
No matter what solution I/we come up with to get this block up to 24.5 inches, I'm quite pleased with how its coming along. I've started in on my next border. I'm enjoying the process of making it, but I'm not sure it really "sings" with what I have so far. I will show you more later this week and you can tell me what you think :)
24 comments:
Beautiful!!
I am not really sure how big it would need to be, but could you add another scrappy and thin border like the first one? Or even a solid one, to bring it up to size? It is lovely BTW!
I'm with Patchwork and Play - a very thin border, from a single fabric, added on might be the easiest solution - it could look pretty good?
I'll second (third) that suggestion, a thin border would work - maybe in a solid to frame what you've already got. Love what you've done so far.
Lovely! Very bright colors. Perfect for the foggy day like today!
Would go for an other finished 1/2'' border around. Like a wall with bricks or solid. I am sure it looks great
I'd be lazy, and just see if I could compensate with the next section... It looks fabulous.
it looks great, your seams look crisp to me! I'd add a very thin border all the way round to add the extra 1/2 inch, just one fabric.
Okay so you know what I think!! It's stunning. Put the scissors down ✂️ Xx
wow it's gorgeous!
This is turning out so well. I can't wait to see what else you add.
Your centre block is amazing - such a lot of pieces in one 12.5' block! Being partway through my own medallion I know that making sure one round is exactly to size before adding the next is crucial. Not what you want to hear, but if it were me I'd unpick and redo. It will be worth it in the end.
I'm not clear from what you wrote, if you are actually too small or not. But in any event, I would see if you could just upsize the next border by the missing amount instead of changing this one. If not, then add a skinny border piece all round, of one colour or do it as four colours, one per side.
I'd go skinny border, maybe trimming a little more off first to stop it being too skinny.
The centre block is stunning xxx
Just ridiculously amazing!!
I am still working on the medallion...gonna have to work hard to catch up! Yours looks fabulous. I am sure you can fix it in no time!
The centre looks fabulous, but I'm totally with you on the finished/unfinished angst, our medallion is causing no end of confusion!
Oh, it's magnificent!!! If you can't make up the size in the next round I'd add a skinny (solid?) border - 0.25" all round would look good (if you could guarantee getting it straight) or you could trim a bit off the existing border and then add a slightly wider border.
Navy skinny border would be my option! Don't like unpicking!
Your next border may not sparkle as much as you like but if everything does then nothing does if you get what I mean! You need quietness too.
Brilliant start I an in love with it! It has brightened my day!
This is stunning! Can you ask the next person to add 0.5" to their measurements for you? Jxo
Oh so pretty.
Are you doing it all yourself or trading it round? If it's all yours, why not just add the bit bigger bit to the next layer?
Love the orange with the red - hot, hot, hot!
Your center block turned out beautifully! I also like the borders.
this is stunning, and the colours work so well for you. As always, I am playing catch up, still finishing my first centre and border
Post a Comment