Showing posts with label goodie. Show all posts

Tuesday, June 2, 2015

Re-Joining Sewing World: Quick Little Purse

I am pretty sure it was 1683 when I last sewed. At least it seems that long ago.  We are through the craziness now (or we think we are!) and I think I can finally dust off my beautiful Pfaff for some quality time together.  Thank. Goodness.


For two months I have been driving around with a printed Clover Bag pattern in the back seat of my car.  There are also umbrellas, a patient leaflet on cardiac procedures, Love Patchwork and Quilting issue 19, a wool hat, a pair of knee high black boots, hexies and a travel sewing kit back there.  Anyway, I saw the pattern released on Michelle's IG feed and fell in love immediately.  I bought it, printed it and then progress came to a screeching halt.


This past weekend, though, I pulled it out of the car and brought it up to my sewing room.  Oh, the glory!  I love little hand held bags that fit just keys, a phone and my wallet for a night out.  I have about a million of them in black, one AWESOME one in green, but I wanted one in navy blue as that seems to be sneaking into my wardrobe a lot.


A lot of preparation goes into making this bag, but when you have that sorted it comes together quite quickly.  I used two Country Girls fat quarters and still have a reasonable amount left over.  I love how the fabric looks, dig the green zipper and tabs that coordinate with the lining and love the size of it.  The little pleat on the side is adorable.  The pattern is, for the most part, very clearly written with tips and tricks along the way.  The photos included in the pattern are very helpful.  The only downfall for me was inserting the top panel of the bag that holds the zip. I could understand the instructions getting the fabric one either side of the zip (that went surprisingly smoothly!) but getting that attached to the outer shell and then for the outer shell to attach to the lining was a total disaster for me.  Lots and lots of puckering and loosing sharp points (second photo, upper right corner) because you are sewing partial seams and can not see properly where corner seams lie with the fuzzy fleece.


Usually I can say that I would be better at a difficult step next time having done it this time.  I do not see how that is possible here.  It is good it's a super cute bag - I am sure there will be many in my future because of the cuteness and ease of the other steps.  Boy, though, that zip was a killer.

Monday, April 20, 2015

Thank You Gift

You know how great the quilting community is.  We all do.  Well, some of that greatness came to my aide a few weeks ago.  A wonderful quilter, Miss Kelly of Jeli Quilts, used her super skills to design paper piecing templates for my medallion quilt.  You see, I have decided that I want my next border to be flying geese, but I could not find a downloadable template that would let me string together geese so that they finished at the exact same length and width that I needed to coordinate with my medallion quilt top.

Kelly, the paper piecing pro, wasted no time in designing and sharing templates with me, letting me create the quilt top that I have floating in my head.  What wonderful generosity!

To say thank you, I made her a notebook cover using her flying goose templates and my notebook tutorial.  I combined Essex Linen in Navy as the background with Cotton & Steel basics (from my stash, not the shop).  There's a book mark ribbon to keep her place and a little button/ribbon closure so the contents are not damaged when it's tossed in a bag on the run.

The front.
The back.
Inside you'll see the ribbon book mark on graph paper pages.  Of course it's grid paper, right?  What else would a quilt block design genius need?

Wishing now that I did my nails before this photo shoot!  Yikes!
The pockets to hold the front and back cover are also Cotton & Steel basics with a Cotton & Steel lining to coordinate with the exterior.


I hope she likes it.  I hope she thinks it's fun, colorful and happy, inspiring her to design and create because she certainly gave that gift to me.  Its by sharing, inspiring, teaching and encouraging that this quilting community is as wonderful and kind as it is.  Its' people like my fairy template godmother who make this community such a special place.  Thank you.

Monday, February 16, 2015

Birthday Hand Puppets

 I have been secretly sewing a birthday present over the past few weeks, but I am not ready for the grand reveal just yet.   You will see it all eventually.  Until then, I will show you these little extras that go with her "big" present.  I hope she likes them!


I picked up a pattern (on sale!) from Precious Patterns on Etsy for a monkey, lion and tiger hand puppet.  These are made from felt and embroidery floss, hand stitched and hand embellished.   This is my first time hand stitching anything beyond a hexie or binding, so it was new territory.  Felt is wonderfully forgiving, hiding nearly all of the stitches in it's "squishiness".  Perfect for a first go.  We made some modifications to the monkey's face/head shape and the tiger's eyes, but the pattern was beautifully written, easy to follow and are super cute in person.  I hope our little birthday girl loves them too!

Tuesday, December 30, 2014

Handmade Christmas 2014

Hello!  It's been a long long time since we have had a good chat.  I hope you are all well and enjoying the last week of the year.  I hope you are snuggled in at home with your family/pets/friends, lazying around, eating too much and sewing to your heart's content.  

Although the blog has been quiet, I have been sewing quite a bit lately.  There is a lot to tell you, but I am sure I will miss out on smaller projects like bee blocks, etc.  If you want to see it ALL, pop over to Instagram (@fluffysheepquilting) and page through my photos for the latest news.  

Where to start?  How about those super top secret Christmas gifts I was making but could not tell you about?  For now we will stick to the success stories - I will tell you about the total failure later.  

At the Modern Quilting Guild of Ireland meetup last September, we had a craft book swap.  I picked up a book on knitting animal hats.  I know  I am a bit too old/distinguished for this kind of get up, but I thought it might work well for my (nearly) 2 year old niece, Nieve.  


I choose a kitten pattern primarily because it's the only one that I could understand.


I am not the best knitter, but I am persistent.  This was in no way easy for me - I had to re-stitch the hat portion at least 4 times, had a hard time finding a semi-appropriate yarn and kind of made up a good bit on my own.  In the end, though, I had a kitten hat that any 2 year old might be proud (?!?!?) to wear...


The ears are slightly out of proportion and the cheeks a little mal-aligned.  It can be/was also mistaken for a rabbit.  But it fits Nieve and she seems to like wearing it.  We'll call it a success.  I will just need to become a much better knitter as she grows older....hiding my mistakes will become more difficult with time!

Nieve has also become interested in one of my most favorite pastimes: coloring.  While we were together over Thanksgiving, we spent a lot of time drawing, coloring and stickering our creations.


For Christmas, then, I wanted to make her a little tote and portable crayon wallet to bring her crayons and notebooks anywhere she goes.  I started with a little tote tutorial by Jennie of Clover and Violet that is the PERFECT size for this young lady.  It was a very well written tutorial that stitched up in no time.  I used Fancy Free fabrics from the shop as they're girly, but not overwhelmingly pink AND they have bicycles...which Nieve loves.


On the front there's a little ruffle detail on two of the rows...


and on the back an extra large piece of bicycle fabric for her enjoyment.


Sticking with Fancy Free fabric, I made a coordinating crayon wallet for this budding artist.  I choose a tutorial by Modest Maven as it was specifically crated to hold scrap fabric and not a store bought pad of paper.  The little crayon pockets also can hold the fatty crayons or the skinny crayons, so it will grow along with Nieve's skills.  

There's more bicycle fabric on the exterior WITH my very first snap.  I have to say, putting in a snap twisted my brain a bit.  I got there in the end.  


Fully stocked....

Or without paper so you can see the lining fabric.  How cute!


In a completely surprising stroke of luck, it turns out that the crayon wallet fits PERFECTLY into a pocket I installed on the inside of the tote.  Don't I look like a forward thinker?  Ha!


Thank you for brilliant tutes, Modest Maven and Clover & Violet.  You made my Christmas stitching easy as pie!  


Wednesday, October 1, 2014

New Ironing Board Cover

In packing for the Modern Quilters of Ireland retreat, I said that I would bring an iron, a board, cutting mats, etc thinking that since I was local it was easier for me to get stuff there over someone coming by train or bus.

My ironing board cover is 15+ years old and looking pretty shabby.  It's an American-sized board, so the Irish store bought covers are all too short.  I decided if I was lugging that ugly, oversized thing all the way to our retreat, I would use the extra space in the class room to roll out fabric, trace and make a new cover.  It HAD to come home prettier than it arrived.


With 30 minutes left in our sewing day I panicked and started tracing and cutting.  I brought with me the world famous IKEA hippos that were left over from making a quilt backing and scrappy strips of batting to use as a cushion.  It worked a treat! 


I followed a tutorial as a guide, but really I was just a sewing maniac not adhering to their thoughtful instructions.  My hem is not as pretty as theirs and I had to knot together pieces of scrappy ribbon for the tie.  No one will see it and it does the job just fine.  I'm delighted to have a new pretty cover brightening up my sewing room!  Yippee!

Wednesday, September 17, 2014

Aprons for my Helpers

When I brought my shop to the Clarinbridge market last weekend it was a true neighborhood affair.  Not only did the community join in to support local vendors, but the two lovely girls from next door volunteered to help me mind the shop.  They are 10 and 12 years old.  The 10 year old loves pink and purple, loves to perform/sing and can tell a super story playing each roll herself.  The 12 year old is a jokester, an athlete and animal lover.  They are hilarious together.  We visit nearly every day to let our dogs play and hear the news from school.  


They knew I was preparing for the market by cutting fabric and making bundles.  They (in all their cuteness) figured out how they could ride their bicycles the 2 miles over to the next town on the back roads so they could join in the fun.  The night before the market, I get a text from the 12 year old asking if she could help me at the stall for the day.  She (and later her sister) joined me for the day and we had a wonderful time together.  They were chatting to customers, making change, creating bundles, setting up displays.  It was really wonderful to share the day with them and watch them come out of their comfort zone.


Now, what I had not thought about was that I had only one spare shop apron.  In all honesty I expected them to come and mess in the market square for the day.  I did not think they would actually spend it all in the stall as focused shop keepers!  I clearly needed two aprons for my two helpers and I was unprepared.


As a thank you for their time, effort and wonderful company, I made them each an apron of their own.  One in the pinks and purples she loves.  The other in the vibrant teal with birdies, her favorite fabric in the shop.   I used a tutorial from Sew Mama Sew and fabrics from Fluffy Sheep Quilting: Enchanted (pinks and purples) and Kokeshi (birds and teal swirls).  


Of course, this photo shoot wouldn't have been possible without a helper cat.  Clarkson can not resist a sunbeam.


Wednesday, April 16, 2014

Handy Dandy Fabric Weights

Lately I have been wrestling with rather large pieces of sashing fabric or a nearly finished medallion quilt top on my cutting table.  Just as I get them on the cutting board and get my ruler aligned, they slide right off and crumple onto the floor.  It has frustrated me to no end.  What's a stitcher to do but stitch up a solution?


I remembered a tutorial on Oh, Fransson from ages ago that got me started.  After a quick read, I fussy cut five 3.5 inch squares of Melody Miller teacups and then the same of a red/white texty print that I don't know the name of.  I also cut ten 3.5 inch squares of batting, matching each one to a top/bottom and securing it with a grid of stitching about 1 inch in from the edge.


I just matched right sides together, stitched three sides and then flipped them right side out and filled them three quarters full with dried soya beans.  Before flipping, I did trim the corners off and cut away the batting that would have really bulked up the seams.  They were then hand stitched closed.  Easy peasy.


I do wish that I used something a bit heavier as a filling, but these will due for the time being.  They do seem to work, though - they can at least hold down a little pile of LV fabrics in a Galway breeze.  That's saying something!


Monday, January 27, 2014

Quiet Around These Parts

We had a lovely, quiet weekend here in Galway so I have very little to tell you.  There were walks with the dog, dinner with friends, laundry (of course) and a little bit of stitching.  I really enjoyed sit down to my cross stitch each evening.  


The little bone is done and dusted and (with any luck) the "HOME" will be finished tonight.  Just half of the H left.  As you may remember, though, the lettering is more "funked up" than this.  I have to go back and do a little prettying up of the OME.  Easy peasy.  


For a laugh, do you remember that I made hand warmers for my family as a Christmas stocking stuffer?  My SIL came back to me with this story of how she's using them:

"I've been meaning to tell you (and I thought everyone else would find it funny too) that I used your hand warmers when it was so so so cold a week or so ago to walk Lolo - I think it was 5 degrees when I went outside.  Well, they worked marvellously!  My hands were toasty warm the entire time.  The funny part was that when the rice was warmed up it smelled delicious, kind of like popcorn, so all of the dogs in the park were hovering around me and sniffing my hands.  They thought I was depriving them of a treat!  It was very funny.  I looked kind of like St. Francis. 

Anyways, thanks for keeping us warm!"

Hilarious!  Catherine, you are cracking me up!

Wednesday, January 8, 2014

Creating a happy place

Before Christmas I moved my (day job) desk and laboratory into a new building.  It's only now on my return to work that I have focused on making it my fresh, new happy place. I spend so much time at work, I might as well like my little personal space.

I have started stitching my little nerdy cross stitch.  I had such plans to stitch all the way to/from the US over my Christmas break....but the DMC order didn't arrive in time.  (Sigh.)  It did arrive by New Years so I have been happily stitching each evening.  Want to see what I've made?


It's an 18 count piece of Aida, so WAY finer than I am used to working with.  There was a small learning curve, but I think I have found my stride. I choose a soft, light blue/grey color so that the cream of the bone stands out.  I'm quite happy with it so far and can't wait to dive in on the lettering.

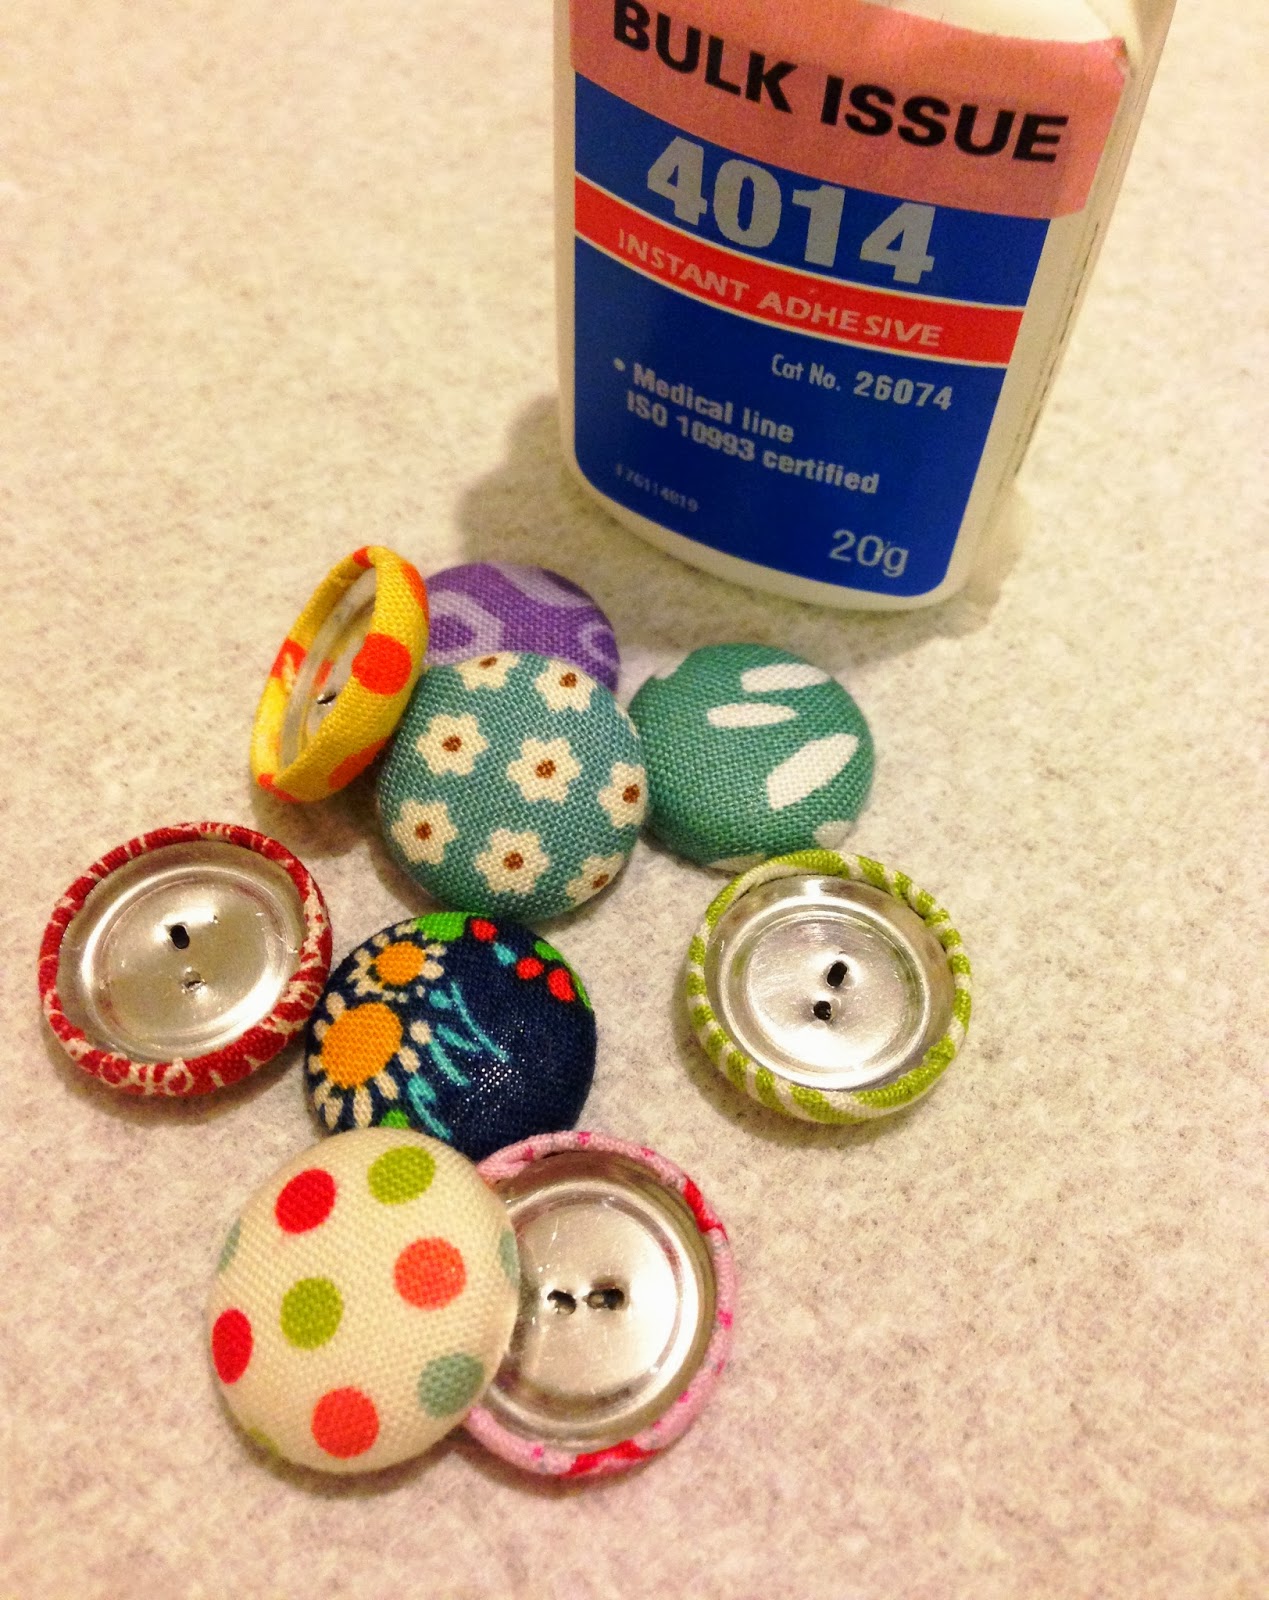
In the mean time, I have a massive grey noticeboard over my desk that is screaming for color.  (Weirdly enough it is nearly the exact color of Kona Med Grey.)  I decided to create little scrappy fabric thumb tacks to bring my fabric prints to work and spice up the board a bit.  So, I grabbed my button forms (stocked up while in the US!)...


and my overflowing scrap basket...


and I started in.  I used a tutorial by How About Orange for inspiration, but had to make a few changes given the bits and pieces I had available to me.


In no time at all I had a set of 10+ thumb tacks ready to brighten up my desk!   How satisfying is that for a nice little evening project?  Perfect.


I won't show you the "finished" version quite yet...will wait for the great unveil of the whole notice board.  I'm now thinking of a little bunting too.  Too much?


Tuesday, December 3, 2013

Stocking Stuffers!

First, a super huge THANK YOU to everyone who came by the shop this past weekend.  If you were just looking or if you were shopping your heart out, I thank you for your support.  I had a wonderful time packing up your precious fabric - it's winging its way to you right now!

Onto sewing news....if you're a member of my family and expecting a gift from me Christmas day, please look away now!

Ok.

This is the first year in a long time that I am not giving primarily hand made Christmas gifts.  That being said, I could not go cold turkey and only give store-bought stuff. I had to make little stocking stuffers.  Using this tutorial, I made seven pairs of rice filled, microwavable hand warmers.


 There's one for each member of my family to open on Christmas morning.  We always go for a walk Christmas afternoon, so they should keep us toasty!


Now, if I just tossed them into a stocking on Christmas day they'd sink down to the toe.  So I made little coordinating drawstring bags using this pattern to keep them together and 'afloat' atop of the candy and oranges.


I used little elephants for my niece Nieve (trying still not to be too girly for my brother), penguins for my Mom (because she loves them!) and fish for my brother (he would flyfish all day long if we let him).


There are stars for Brian (my superstar), birds for my sister in law (she loves a walk in the woods) and chilli peppers for my Dad (our family cook).


Of course there are little sheep for me.


I am totally digging them.  I hope those who find them Christmas morning think they're fun too!

Monday, April 15, 2013

I Love Science

There it is.  I've said it out loud.  I love science.  I'm pretty sure that make me the Queen of the Dorks, but I am quite happy with that title.


When I saw this cross stitch pattern I could not resist.  I was thinking that I might even bring it into work and hang it over my laboratory bench.  Wouldn't that be hilarious?  My peers know my love for needle and thread, so they would get a great laugh!

This is my first finish in the Q2 Finish Along.  I have been working on this since Christmas, but it was retired to the back of a shelf in Jan/Feb.  Now that the pup has arrived I needed to abandon the sewing machine for a few days and work on hand project.  It was the perfect time to dust off this cutie and finish it off.  I'm so glad I did!


Wednesday, March 27, 2013

Incognito Wallet

For those who get weirded out by feminine hygiene products, you might just skip reading this post and come back tomorrow.  For those with a witty sense of humor, I can't wait to read your comments below.

A little while ago, I got a request from a friend to make "something to keep my tampons from flying out of my purse".  Flying tampons is a problem, indeed.  I had a good search for a tutorial to follow, but was not able to find something that I really liked.  I did, however, find this pattern that looked interesting.


And I gave it a go, making one wallet.  This may just be the tester version.  Now that I kind of know what I am doing, I think I can make the next one a bit better.  

It's a tri-fold wallet with a little strap that wraps around the whole purse, holding it together with a little piece of Velcro.


Inside there are little pleated pockets for tampons (five here), followed by a pocket for a little, folded panty liner (middle huge red pocket) and finally a pocket for pain meds (blue, on the right).  There's more than enough space to hold everything you need in your bag.  Maybe a bit too much...it is a wee bit chunky and not at all subtle for a small handbag, contrary to what I anticipated given it's the Incognito Wallet.


Although I am reasonably happy with the fabrics used here and with the overall layout, there are two mistakes that are driving me crazy.  The first little pocket (total left) is too small for a tampon as I didn't take the final seam allowance into account.  Stinker.  It's also a small bit of a "free for all" when you're lining up the pocket with the outer casing.  I didn't realize that mine went on a bit wonky, leaving it at an angle.  Both are easy to fix in version two.  I'll have to give it another try this weekend...or I may have had enough and am ready to move on.  Time will tell.

In other news, I am so happy to tell you that the 56 spots in our rainbow charm swap are filled.  There are lots of new faces/names in this swap, so I am very excited to get to know you all better.  Thank you all for your enthusiasm! 
Related Posts Plugin for WordPress, Blogger...

Label Cloud

241 tote all heart appeal antique applique apron art quilt aurifil award baby quilt back background bag basket batik bee Bee Blessed Big Stitch Swap bird's nest birdie stitches birthday blankets of love block blog blogaversary blogger bundle bloglovin' BOM book brit bee brooch bundle bunting business card holder camping cathedral window chain piecing chaos charm pack charm squares charm swap chickens Christmas class clothes color commission community community quilt contest craft craft fair cross cross stitch Cúchulainn cushion design wall diaper Do.Good Stitches donation double wedding ring drawing dress eclipse election electronica embroicery embroidery eraser stamp exhibit fab fabric fabric tape facebook FAL farmers journal fat eight fat quarter fat quarterly feature festival of quilts film finish finish along flag flickr flying geese FMQ FNSI frame Free Motion Friday free motion quilting friends fugly Galway Galway Now gift giveaway goal goals goodie goodie swap granny mania granny squares graph guest blog guild hand puppet hand quilting hand sewing happy hat help hexagons hey girl hospital hot pad HST I Spy ICA improv innovation award inspiration interview invitation ipad ipad cover IPS IQFOI Irish chain Japanese key fob kind stitches knit knitting knitting and stitching kona lattice illusions laugh launch learning lecture Liberty linky list little star loops love on the blocks LQS Day magazine market medallion mennonite miniquilt mixer cover mod logs Mod Pop QAL modern blocks Modern Irish Bee modern irish quilters modern quilt guild modern quilt guild bee modern stitching Modern Stitching Bee monster mouthy stitches mug rug mural name name game name tag napkin needle book new york beauty newsletter Nieve notebook cover overlocker panel paper piecing patchwork pattern Pay it forward Peace Valley peanut butter perle cotton pezzy pizazz photograph PIF pillow pillowcase dress pin cushion pinwheel PJ placemat podcast polka dot pom pom portholes post pouch precut puffy pouch puppy purse QAL quilt quilt exhibit quilt frame quilt top quilter in the gap quilting Rainbow Charm Swap research retreat retroflower review sale sampler scarf science scrap scraps screen printing seams selvage sew and bee happy Sew Bee Blissful sewing machine sewing room shop significant sizzix sketch skirt solid spools stall stand star stargazing start your own stitched in color string stuffed super tote surprise swap swoon tablerunner teaching text thumb tack tiles top tote toy travel tree skirt tumbler tutorial twinkle twinkle twitter video vote walk wallet website win WIP wonky house yarn youtube zip

Total Number of Page Views