Showing posts with label pattern. Show all posts

Monday, February 15, 2016

Sew Portable Travel Set

Although I had clear plans in mind of what I wanted to do this weekend to prep for a sewing retreat (pull fabric, download patterns, cut a bit...)  it was all thrown out the window Friday afternoon when I found this pattern: Sew Portable Travel Set by Jeni Barker.  Stop. The. Press.  


You know how it is when the perfect pattern finds you at the perfect time?  It is hard to do anything other than sew.  You see, this sewing retreat will be the first adventure for my new Singer Featherweight.  Meet Thimbelina.  She is a special girl who is up there in age, but sews like a mouse's heart.  She needs to travel in style and here was the perfect travel set for her.   I downloaded the pattern, drove home and dove into the shop's stock of Purebred.  I was only waiting for an excuse, really.  


The bag is a sturdy one, with reinforced corners, layers of batting and heavy weight (hidden) canvas and a solid wood bottom to take her weight.  The straps are belting prettied-up with coordinating strips of Purebred.  Quite straight forward, really.  This portion of the pattern was beautifully written with very clear instructions and super photos.  It was a joy to make.


Little Thimbelina fits inside perfectly with a little room to spare.  Jeni B is using her bag alone to carry her machine, but I am hoping that I can still fit the machine in her little case (to protect her in travel) and then inside the bag. The bag will offer a welcome set of handles when I really do not trust the one on the ancient case that came with her.  


Also included in the pattern is a draw string bag that perfectly fits the foot pedal and cords.  It is super.  Until now, mine have lived next to Thimbelina in the base of the case.  I have worried they will scrape the paint, but now they are safe and sound.  If you do buy this pattern, pay attention to the instructions making this bag.  Although Jeni B clearly states how to orient your directional fabrics to ensure the lining is right side up, I (being a picture girl) followed the diagram and now have upside down lining.  It is only me that will see it and I do not mind enough to rip it apart and fix it.  Just wanted to give you a heads up to follow the text and not the figure.


Finally, there are instructions to make a little quilted cover to protect the folding extension table from the metal screw on the front of the machine.   This is a wonderful solution.  I was quite jazzed when I read about it in Jeni's blog post.  


The only problem is that it does not fit my machine!  I guess Jeni's does not have a wedge support on the bottom.  With luck there was a tutorial posted today on IG to create this exact cover with a wedge/triangular side.  I will pop that on my do-do list for the retreat.  I am not sure what I will do with the little pouch I have now, though.  Pop a button hole in there and use it for the manuals?  I would need to install a zip to hold thread and bobbins.   I'll keep thinking.  

All in all it was a super pattern.  I am delighted with what I have made and can not wait to take it all with me next weekend.   I will leave you with a photo of Miss Molly, my photographic assistant.  She has just turned three and is looking all grown up to me....the little cutie.


Monday, July 7, 2014

The Alder Skirt

At the beginning of the year, I listed the ways I hoped to expand my sewing skills.  I was itching to start sewing basic clothes.  You see, I started sewing with quilts as I loved (and still do) the combination of geometric design with color/pattern.  I was not that girl who made their own skirts or Halloween costumes.  It never crossed my mind.

Anyway, I was thinking in January that it's time to sew some very basic things for myself.  I started with PJ bottoms, which were semi successful.  More recently, though, I saw several posts with the Alder Skirt, from Imagine Gnats, popping up.  I can make that...right?

After a semi-successful trial run with IKEA fabric, I dove into the shop's stash of Essex Linen Navy and Vintage Happy Orange Hangers and I started cutting.  After an evening of manic stitching, a skirt was born!


I dig it.  It has a little pleat in the front, which makes it quite roomy.  Pleats would have scared me except for the little top I made for my niece.  I had mastered the pleat and was ready to fly to pockets.


What do I know about pockets!?!?  I freak out if a bag pattern has a pocket.  The 241 tote (here and here) is my least favorite thing to make just because of the exterior pockets.  These were different, though - not those awful rounded bottom pockets I was used to, but pretty straight forward rectangular piecing.  I was feeling confident at this point.


Now, here I got very brave.  I originally used fully Essex Navy for the whole bottom of the skirt.  However, I'm a shirt-out girl and then you couldn't see the orange pretties when I was wearing the skirt.  So, I took out the scissors and cut off the bottom 1.5 inches of Navy and replaced it with orange Vintage Happy.  It's SO much better with the addition of color.


Over the weekend we had a photo shoot in the back yard to show you all the finished skirt.  I have to say, this is one of the funniest things we have ever done.  Ever.  I was crying laughing at my other half with his faux Italian accent, flashing the camera all over the place barking instruction.  He even finished with a very dramatic "its a wrap".  Oh, I couldn't keep a straight face...so you won't see a photo of the full me here.  Clearly.


It is supposed to fit around your hips, but my skirt continually inches up to my waist.  So, when I made the original IKEA tester, I had used the size chart in the pattern and stitched according to that guide.  However, when my skirt inches up, it became very roomy in the hips.  This version I made one size smaller and it suits my hips and waist.


It's very comfortable, flowing but stays put in the Galway breeze with the heavier linen fabric.  I'm quite happy with the finished product and would absolutely make another if we were to take a trip somewhere warm.  Rachel's pattern is very clear, easy to assemble and has great step by step instructions.  So much so that with minimal thought I could make my own with no previous garment sewing experience beyond my niece's tops.  I would absolutely advise, though, making a tester in not-so-precious fabric to be sure you have the right size for you.  Beyond that, the Alder skirt is an absolute hit around here!


Monday, June 30, 2014

The Canvas Pattern: Now Available in FSQ

I am delighted to announce that She Can Quilt's Canvas quilt pattern is now available at Fluffy Sheep Quilting {the shop}!


You can find the pattern by clicking on the "Patterns and Kits" button on the shop home page, or by following this link.  Currently the pattern is available as a PDF that will be emailed to you after your purchase.    

Created by Leanne of She Can Quilt

Leanne's pattern is very clearly written with a lovely prologue describing considerations when you are designing your own Canvas quilt.  She helpfully includes size charts including fabric requirements, two cutting charts and figures for each step of the piecing process.  

Created by Leanne of She Can Quilt

My favorite thing about this pattern is that you can use it time and time again in different sized projects for different occasions.  Included are the cutting instructions for each of the following projects: mug rug, table topper, napkins, pillow, mini quilt, baby quilt (two sizes), lap quilt (two sizes), queen quilt (two sizes) and king quilt (two sizes).

Made by me!

With a new pattern hanging around the shop, I could not resist giving it a try!  I thought I would make myself a set of four napkins.  For the first time, I cut into my precious Locally Grown fabric for the centers, framed it with Kona Tomato and Kona Bahama Blue and then set off with Le Creme Swiss Dots in red.  They're backed in more Kona Tomato.  Can't have enough red.


They are generously sized napkins, so you can easily square them without them shrinking too obviously.


I think they will be fun for our next picnic.  I would absolutely return to this pattern for my next house warming gift or if I need a baby quilt.  The Canvas pattern offers a great opportunity to personalize each project with the fabrics you use while still offering great impact with its design.  Lovely job, Leanne!

Tuesday, June 3, 2014

Fabric Overload

Non-sewing life has taken over the past week or so, so I have little quilt-related stuff to tell you.  I am just checking in to say hello.

I was in the US visiting family for a short week of camping over Memorial day.  Of course, while I was there I could not resist a trip onto the LQS to grab a few pretties.

My mom found this pretty bundle.  I can not get enough of the bees and chicks and the
lady bugs were so cute!  At -50% who could resist?  

Re-stocking LVs that are very depleted after the medallion quilt.  The yellow Woodlands
print will be the medallion binding.  Can't wait to get that far in my medallion quilt!

And pretty FQs that sparked my interest.  I guess I was in a retro kind of mood?
I also scooped up a few Denyse Schmidt prints to coordinate with those I picked up over Christmas.  I have decided that these will be used in a queen sized quilt that I would like to make for a special family.  Now I just need to choose the right pattern.  Suggestions are welcome.  I am looking for a modern twist on a traditional block.

Never very good at these roundy photos, but you get the idea of the full mess
of fabric I have in mind for this quilt.
Edited to add: I didn't buy ALL of this on this trip...these are my Christmas goodies along with my new purchases.  You guys must have thought I was mental!

Cool prints...
Warm prints....
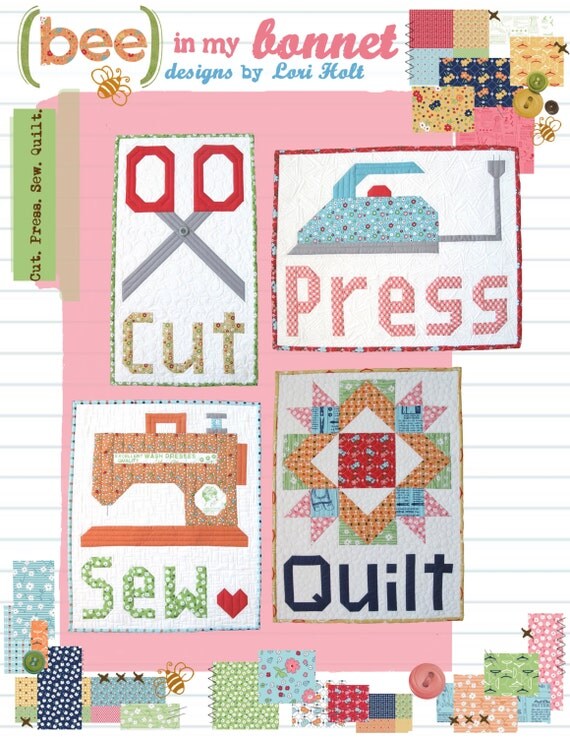
I also pre-ordered Lori Holt's new pattern for four mini quilts, so it was waiting for me when I landed in the States.  I am really digging her style right now and can not seem to get enough Vintage Happy.  Her new line, Flower Patch, has already been ordered for the shop!  Mmmm....pretty.  I am delighted to have a copy of this, but the piecing is VERY involved.  I thought it was paper pieced when I bought it, but no.  It's a million tiny little individual pieces.  I'll have to join in her QAL to really push myself.


And finally, through IG, Amanda (@graccieone) and I organized a magazine swap.  I passed onto her the two latest issues of Love Patchwork and Quilting, while she gave me an issue of Quilty and the one and only Love Patchwork that I was missing.  Thank you, Amanda!  I am totally in love with the cover quilt on this issue of Quilty.  You may see it in the making this summer!


That's what's going on around here.  I have started in on my Bee Blessed blocks, too.  Will show you those later this week.  Watch this space.


Monday, March 24, 2014

PJ Bottoms!

I finally bit the bullet and made my first piece of clothing: PJ bottoms.  I know this is not rocket science, but it is a leap for me.  First off, they are 3D.  I do not normally do well with things that have more dimensions than a quilt top.  Second, they use a paper pattern, which I have never followed before.  But when I saw Judith's post last week I had to just dive in and give them a try.

Using IKEA fabric...just in case I make a massive mistake!
I bought a pattern for these PJ bottoms while I was in the US over Christmas, and used this handy dandy method to trace the pattern onto tissue paper allowing me to create templates in two sizes - pink paper for my pants and blue paper for my other half's pants.  I love a good color code.

I bought this particular pattern for one reason and one reason only:  they were drawstring pants.  I hate elastic PJ bottoms.  Do you see this nice, happy family on the cover?  


Do you see that they LOVE their drawstring pants?  Sorted.  I dove in.


As I was following the pattern instructions and sewing away, I just couldn't imagine how the instructions lead to a drawstring top.  I couldn't see it coming together.  But, sometimes that's how it is with me and 3D projects.  Only when I have it right side out and flipped so the top is on the top it becomes clear.  It DID say on the back cover that you would need a length of elastic and a length of twill for the tie, so I was confident it would all work out just fine. ...  I was waiting for the light bulb moment.  

And FINALLY.  I see this:


Accompanied by this:


WHAT!?!?  A fake draw string?!?!  Are they serious?  I carry on and put in the elastic waist and they fit himself reasonably well.  

Stinky night time indoor lamp light photo.  Sorry, guys!

Luckily enough he'd rather have a bit of elastic than a drawstring so all is well that ends well.  At least I know now how to put them together, how to scale the pattern to fit me and how to modify it to add in a proper drawstring.  I guess it's like cooking, you have to follow the recipe the first time to be able to  modify it to taste the second time.  

I'm glad I gave them a try, I'm delighted he's happy with his new pants and I think it's great to have a go-to pattern for a quick make (perhaps for a gift?) so all is well that ends well.


Monday, January 6, 2014

Hello! Hello Out There!

Hi there!  It's been weeks and weeks since I last blogged.  I am so happy to re-join our lovely online community.  How are you all?

I took a blogging/IG/sewing break over Christmas mostly because it is just not practical to keep things up and moving while I travel to/from the US for the holiday.  Anyway, I am back in Ireland and ready to dive right back in to blogging/IG.

While I was in the US, I picked up a WHOLE LOT of fabric orders I had posted to Pennsylvania.  These goodies were picked up from American shops in sales from Aug through Dec.  Needless to say I had a great time digging through these parcels after my flight landed.  Yum yum yum!

Wait!  Re-focus.  I have been thinking a good bit about how/what I sew, about blogging and about the shop.  I have come to a few conclusions I would like to share with you.  (Interspersed with photos of my new fabric/notion goodies!)

Two layer cakes and one charm pack.  They were at insane sale prices, so I couldn't resist.
The plan is to make two single-bed sized quilts for B and I to use when camping in front of the camp fire.
Get it? The camping themed S'more Love line and Road 15 prints seemed perfect.

It's time. I should start making basic clothes like PJ bottoms and skirts.
Why not start with this?  I can do this, right?  I already have questions before I even opened the package!!
Also on insane sale at Joann's (-75% or something nuts).


1. Blogging - Blogging seems to get pushed to the bottom of my to-do list each day.  I do not want it to be that way.  I love chatting with you guys; love the laughs and inspiration I gain from each of you.  Instead of ignoring my blog, what I would like is:

A) reading your blogs over my lunch break each day for a bit of mid-day quilty inspiration.  I am usually pretty bad at reading weekend posts and I think it is going to stay that way.  Too much real-life living to do over my weekend :)

B) aim for posting 3 times a week.  I tend to get overwhelmed thinking of 5 posts per week, then spend all of my free time writing posts and not sewing or (worse) not writing at all!  Or I get focused on showing you only finishes instead of where I am each day/week.  Instead, I will most likely sew week evenings/weekends and write three posts on Sunday to go live through the week to tell you about all of the creative action here at FSQ headquarters.

Three Blueberry Park FQs from my LQS in Pennsylvania.
I'm so lucky to have such an awesome LQS when traveling.
I know so many of you love this line, but I just don't get it.
I thought if I made something I'd see what you see?  Maybe?

Also from the LQS.  Who could resist Echino at American prices?  I couldn't, clearly.

2. Shop - I would like for the shop to become a bit more interactive with each of you.  For that reason, I will be offering monthly blogger bundles (have the first three brave volunteers lined up already!) with each blogger putting their own spin on the fabric choices, associated tutes and giveaways. I think it will be great fun.  I will also start organizing monthly activities/contests to spruce things up around here.  Keep your eye out for a way to play along in the near future.

Hello Tokyo.  I. Love. This. Line.  The whole thing.
This is destined to become a new lunch bag going to/from work.
3. Sewing - I am at a loss here.  I would like to:
A) create more from my stash (without going on a fabric diet!) and for that reason will link up with Sarah each month. I love my stash - why wouldn't I use it more?

B) be more creative and THINK more about what I am making.  The planning/thinking/math of a project is nearly as great for me as sewing it - I love letting my mind tumble over these problems when I'm falling asleep or driving.  I miss that when I have a set pattern that I'm following.  For that reason I have a project in mind starting next week that will be a new adventure for me.  More on that later...

C) create more by hand.  I am not a great hand piecer, but would like to gain more confidence hand quilting or in needlework like embroidery/cross stitch.  That way I get to create on my couch and still interact with my family WHILE indulging those creative juices.

Denyse Schmidt from Joann's.  It was on sale and I couldn't stop myself.
Oranges, reds and yellows...

....and more from the same line.
I'll have to do some epic-scale quilt to incorporate all of these prints/colors.


Those are my mental rumblings.  2013 was not my most creative or fruitful year.  I will do my best to grow in 2014 and to really push my skills/ability/productivity.  Here's to fresh starts!

Monday, February 11, 2013

All ready to go!

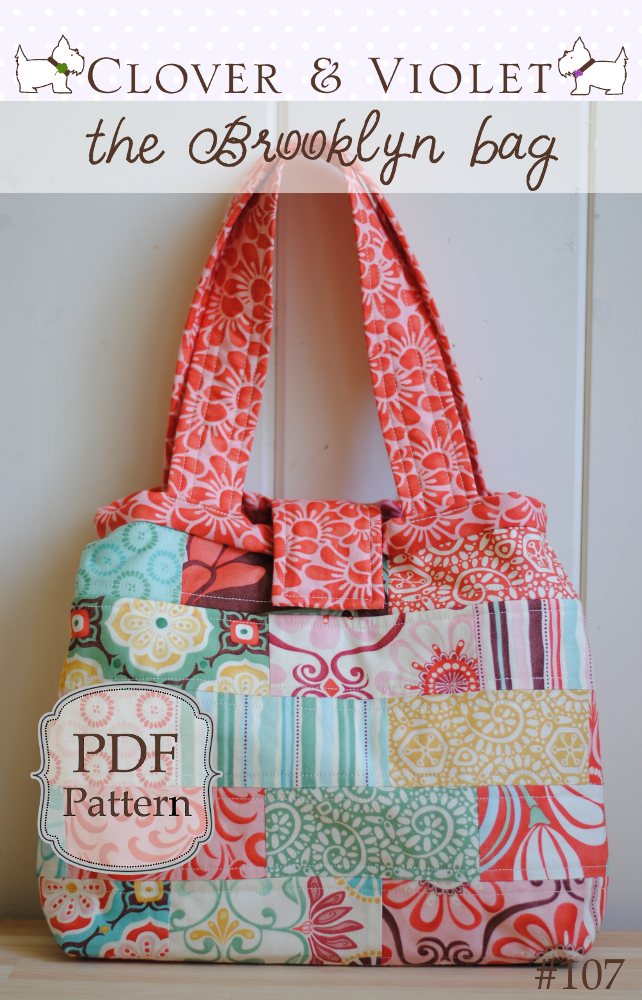
In the last 2012 Finish Along, hosted by Rhonda, I was lucky enough to win the give away from Clover and Violet including a bag pattern and a charm pack to use with the pattern.  It was PERFECT for me as my winning project was my Mouthy Stitches bag.  I love things that come full circle.  

I chose the Brooklyn Bag pattern (in PDF)...


And a tasty charm pack of Joel Dewberry Notting Hill prints...


They have both safely arrived in Galway now, so I am ready to get stitching.  I just need a quiet Saturday to get down to business.  Thank you so very much, Rhonda and Jennie, for such a great win.  I am absolutely thrilled!

Thursday, June 21, 2012

Collaborative Quilting: A book review

I made a mistake.  One of those mistakes that you realize it's just too much effort to fix it so you accept it.

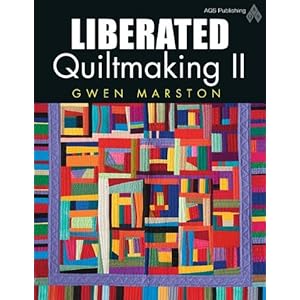
When I was at the International Quilt Festival of Ireland, there was a book stand FILLED to the brim with crafty books.  I had a thumb through the primarily traditional books and found a copy of Liberated Quiltingmaking II by Gwen Marston.  I liked what I briefly saw in the sample copy, so I picked up one of the plastic wrapped for-sale copies stacked behind it and happily paid the nice vendor lady.


You see where this is going, don't you?  Too bad I didn't.

I carried it around all day in the back pocket of my messenger bag and never looked at it again.  When I sat down in the sun with my friend Ester for a coke (me) and ice cream (Ester) I saw a patchwork appliquéd chicken peeking out of the pocket.  I thought that was odd, but quickly justified it as the back cover/advertisement for another book.

Once I got home I realized my mistake.  I bought the wrong book.  I bought this....


Luckily it was still in its plastic wrapping!  So, I contacted the vendor and they were super nice and willing to take it back for a refund.  I packaged it up and brought it to the post office to ship it off.  Here's the snag.  It would cost me nearly what I paid for the book to send it back.  I'd still be out the full cost in total AND would not have a book.  I brought it home and unwrapped it to have a look.

And I fell in love.

How fantastic is this?  


Goodness knows why they put clucking chickens on the cover when the book is CHOCK full of gorgeous modern improv quilts!  They are spectacular!


This book is really on collaborative quilts created by Freddy Moran and Gwen Marston.  There's a large section in the beginning where Gwen discusses design and Freddy discusses color.  The chapter on color was really interesting to me.  Want my two favorite half paragraphs? 

"I am fearless in my use of color.  I feel comfortable with almost every color with the exception of brown, which I consider a non-color.  If there are no bad colors, just misunderstood ones, I can say for sure I do not understand brown."  -Freddy Moran

It's like this book is written for me!  And here's my aspiration...to be this comfortable in quilting:

"Red is a neutral.  I've never met a single color that didn't look better with red."  - Fredy Moran.

If only I could be that bold with quilts.  Maybe some day.  

They take you through their philosophy of color, design and block interplay and show you a glimpse into both studios.  If only we'd all be so lucky to have studies like theirs.  Amazing.  But, possibly my favorite part beyond the eye candy, is the inclusion of some really basic patterns for pieced borders.  This one in particular is interesting for my Granny Mania quilt with a little twist using pin wheels instead of four patches.  Same idea, though. 


I am completely pleasantly surprised by this book.  I will find lots of inspiration in their gorgeous quilts and will happily use their instructions for a little twist on my quilt borders.  All in all, the old lesson rings true.  Don't judge the book by it's cover.  Give this one a second look.
Related Posts Plugin for WordPress, Blogger...

Label Cloud

241 tote all heart appeal antique applique apron art quilt aurifil award baby quilt back background bag basket batik bee Bee Blessed Big Stitch Swap bird's nest birdie stitches birthday blankets of love block blog blogaversary blogger bundle bloglovin' BOM book brit bee brooch bundle bunting business card holder camping cathedral window chain piecing chaos charm pack charm squares charm swap chickens Christmas class clothes color commission community community quilt contest craft craft fair cross cross stitch Cúchulainn cushion design wall diaper Do.Good Stitches donation double wedding ring drawing dress eclipse election electronica embroicery embroidery eraser stamp exhibit fab fabric fabric tape facebook FAL farmers journal fat eight fat quarter fat quarterly feature festival of quilts film finish finish along flag flickr flying geese FMQ FNSI frame Free Motion Friday free motion quilting friends fugly Galway Galway Now gift giveaway goal goals goodie goodie swap granny mania granny squares graph guest blog guild hand puppet hand quilting hand sewing happy hat help hexagons hey girl hospital hot pad HST I Spy ICA improv innovation award inspiration interview invitation ipad ipad cover IPS IQFOI Irish chain Japanese key fob kind stitches knit knitting knitting and stitching kona lattice illusions laugh launch learning lecture Liberty linky list little star loops love on the blocks LQS Day magazine market medallion mennonite miniquilt mixer cover mod logs Mod Pop QAL modern blocks Modern Irish Bee modern irish quilters modern quilt guild modern quilt guild bee modern stitching Modern Stitching Bee monster mouthy stitches mug rug mural name name game name tag napkin needle book new york beauty newsletter Nieve notebook cover overlocker panel paper piecing patchwork pattern Pay it forward Peace Valley peanut butter perle cotton pezzy pizazz photograph PIF pillow pillowcase dress pin cushion pinwheel PJ placemat podcast polka dot pom pom portholes post pouch precut puffy pouch puppy purse QAL quilt quilt exhibit quilt frame quilt top quilter in the gap quilting Rainbow Charm Swap research retreat retroflower review sale sampler scarf science scrap scraps screen printing seams selvage sew and bee happy Sew Bee Blissful sewing machine sewing room shop significant sizzix sketch skirt solid spools stall stand star stargazing start your own stitched in color string stuffed super tote surprise swap swoon tablerunner teaching text thumb tack tiles top tote toy travel tree skirt tumbler tutorial twinkle twinkle twitter video vote walk wallet website win WIP wonky house yarn youtube zip

Total Number of Page Views